Thursday, September 30, 2010

A Couple of Beading Projects

I recently discovered that I love beading.  It's an inexpensive craft with such amazing results.

One of the little girls I watch loves any and all types of hair accessories, so I thought I would make her some clips for her birthday last week.  I got the tutorial for the beaded flowers from Martha Stewart's Encyclopedia of Crafts which I got for Christmas last year.

Start by making each petal.  I used the template for the Forget-Me-Not flower.


Make 4 to 6 petals, add a white bead in the middle and you're done!  Okay, now repeat 9 more times.


I started with this packet of clips I got at Target (which just so happened to be the exact same colors as the beads I already had - perfect!).


Attaching them was the hard part.  I ended up cutting all the excess wire off of all the petals and hot gluing them individually.  They're still on there a week later, so I guess it was a success!  I thought this would be a fun way to jazz up some fairly boring clips for a 3-year-old.  What do you think?

Now on to the next project.  If you remember, I got some beads at a garage sale last weekend, so you know I had to go to Michael's and get supplies to make a necklace.


Supplies:
Beads
Crimp beads
Transite
Jump rings
Lobster clips


Of course, I had to have a helper.  She didn't so much as help as chase the beads around the living room floor and eat the plastic baggies they came in.  Thanks anyway Maggie!


And the finished product!  Okay, I know this wasn't really a tutorial, but how much easier could it get?  Find a pattern that works for you and keep stringing until you reach the desired necklace length.  I really like it but I think I might add a 3rd shorter strand with a single type of bead.

Ciao!

(Did I really just say ciao?  I never say that, but I couldn't think of a way to end this blog post.  Oh well, might as well say bye in as many other languages as I know...)

Hasta luego!

Auf widersehen!

Au revoir!

Okay, that's it.  Happy Thursday!

Saturday, September 25, 2010

Garage Sale Saturday

Steven and I have gone garage saling the past two weekends, and I think we're addicted to it.  We never buy all that much but it's just fun to look at all the crap treasures people have.


We got the large mirror with white frame (that looks like it's never even been hung on a wall) for $3, and the small mirrors were 50 cents each.  I think I'm going to do some sort of craft with the small mirrors, but I haven't decided what.


I got these two packets of beads for 50 cents each.  I think some sort of necklace is calling my name...


I really don't know what I'm going to do with these turquoise Ball jars, but at $1 each, I couldn't pass them up.  I'll come up with something.  I'm thinking they will find a home in our bathroom in NC.  I saw these exact same jars at an antiques store today for $6.50 each!  Granted, they had lids, but still, I don't think lids are worth $5.50!

And...


A gumball machine!  Can you believe it?  $10!  We bought some small gumballs at Dollar Tree, but they're too small, so we may have to splurge for the humungous gumball container at Sam's that should last us a lifetime.  Do you know how hard it is to find gumballs?!  Whoda thunk it?  Yes, it is residing in our bathroom right now, which I realize is kind of weird, but it matches our yellow towels and rug!  And we don't have anywhere else to put it.  I wish it had a stand, but it's pretty cool even without it.

I was trying to talk Steven into buying an ugly green desk, but he wouldn't go for it.  It was only $10, solid oak, and all it needed was a little paint!  I know it could've been really cute, but the voice of reason won out... we didn't really need it.  It's hard to pass up such a great deal though!

I'm really sad that the garage sale season is almost over.  Maybe I'll just have to hunt for crap treasures on Craigslist instead.

Friday, September 24, 2010

Photoshop Pop Art Tutorial

I've had a lot of questions about how I created the pop art style images for my Pop Art Canvases, so I thought I'd put together a little tutorial for those of you who may be interested.  Here we go... bare with me as this is the first Photoshop tutorial I've ever done!  By the way, I live in the dark ages and only have Photoshop CS, so some of the info I'm giving you may be outdated if you have a newer version, but you'll still get the basic idea.  (Click on photos to enlarge.)


Start with any photo of your choosing (close-ups with simple backgrounds work best) and open it in Photoshop.  First things first: crop it to your desired size.  I bought a four-pack of 6 x 6 canvases at Michael's, so I cropped all my images to 6 x 6, but in hindsight, I should have cropped them a little smaller to make them fit nicely on the front of the canvas.  5 1/2" x 5 1/2" would have worked better.  Just keep this in mind for however you're using the final product.


Open your photo in Photoshop.  First things first:  Make a copy of your Background layer by dragging the layer to the "Create a New Layer" button OR go to Layer > Duplicate Layer.


Make sure your Background copy layer is selected, and set your colors to the default white foreground and black background.  If you forget to do this, you'll realize it after the next step.


Go to Filter > Sketch > Stamp.


In the Stamp box, you can change the Light/Dark Balance and Smoothness to your liking.  40 and 2, respectively, worked for mine.  Click OK.


Now, we need to delete the white in our photo so only the black is left.  Go to Select > Color Range.


When the Color Range box pops up, your cursor will turn into the eyedropper tool so you can choose the color in your photo.  Click on any white space in your photo (your ACTUAL photo, not the preview in the Color Range box), you shouldn't need to change the Fuzziness, and click OK.


Now you should have the marching ants around all the white in your photo.  Before you do anything else, make a copy of your Background copy, and hide the original by clicking the eye next to it.  I like to make copies of everything just in case.  You never know what might happen.


Make sure you have the Background copy 2 layer selected, and press the DELETE key on your keyboard.  All of the white should be gone and only the black should be left!  You can see your original full-color layer behind it.


Choose Select > Deselect or press CTRL-D.


Hide the Background layer and you should see a gray and white checkerboard where the white would be that indicates transparency.  Only the black should remain.


Now to add some color back in!  Create a new layer.


Move the layer underneath your black layer.


Make sure you're on your new layer.  Select your paintbrush tool and choose your color.


Start painting!


Be careful around the edges, but the black outlines should hide the majority of mistakes.  You can change the size of your paintbrush using the "[" and "]" keys, or in the top toolbar.  TIP: Be sure to color the teeth and whites of the eyes WHITE or your subject will look really funny.


Keep painting and changing colors as you go.  Pay attention to details like earrings, eye color, etc.  After you finish your first color combo, make a copy of that layer and then you can use the Paint Bucket tool to recolor it in approximately 5 seconds if you want to do a pairing of four like I did!


Save your Photoshop file and be sure to save each color combo as a JPEG for printing.  Hide and show each colored layer to save them as four separate files.

Since my images were 6 x 6, I created an 8 x 10 document in Photoshop and pasted my image onto it, which I then saved and uploaded to Sam's Club's photo web site for printing.  But you can always print them at home!

So what do you think of my first tutorial?  Easy enough?  Helpful?  Still confused?  Let me know in the comments!

Wednesday, September 22, 2010

What I Wore Wednesday

Day: Wednesday
Where: Anniversary dinner with my hubby
My favorite top ever: Dillard's 3-4 years ago
Pants: Banana Republic
Boots: Bass Outlet

Day: Friday
Where: Work
Shirt: ASU Bookstore
Jeans: AE
Socks (they're so cute - black and yellow checked!): Awesome sock store in Vegas
Shoes: Payless

Day: Saturday
Where: Yard saling
Cardi: Belk
Tee: AE
Jeans: AE
Shoes: Sperry

Day: Sunday
Where: Walmart and Michael's
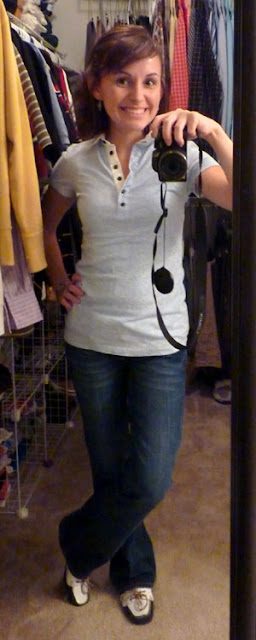
Shirt: Gap
Jeans: AE
Shoes: Sperry

Linking up to:
the pleated poppy blog

Monday, September 20, 2010

I was featured!

On One Pretty Thing for my Pop Art Canvases!  Woo hoo!  Go check it out with all the other amazing projects!

Skulls and Spiders and Wreaths, oh my!

Saturday, I found a wicker wreath form at Dollar Tree and immediately decided that I needed a Halloween wreath. I have fall ones, but I've never found (or wanted to pay for) a strictly Halloween wreath.


Supplies purchased:
18" wicker wreath form (Dollar Tree: $1)
Black roses (2 bunches, $1.99 each)
Black boas (Bought 2, only used 1 so I'm taking the other one back, $4.99)
Bag of skulls ($1.99)
Halloween themed ribbon ($2.79 with 40% off coupon)
Flat black spray paint ($1.99)
Spider rings (Pack of 4, $1)
Orange glitter (I used Martha Stewart Fire Opal, $2.50 with 50% off coupon)
Silver glitter (Generic brand, $1.99)
Total: $22.23 plus tax

Supplies I already had:
Glue gun
Elmer's glue (for glittering)
Wire for bow


First, I glittered all of the skulls and spiders. The glue took forever to dry, plus it's really hard to glitter a 3D object, so I suggest doing this first.


Then I spray painted my wreath black. It took the whole little bottle of spray paint I bought.


I then wrapped one black boa around and secured the ends on the back with hot glue.


I admit, I Googled "how to create a bow". I found a tutorial on YouTube and I think it turned out pretty good! It's really easy. Basically make four loops, leaving tails, and secure the center with wire. Then I just wrapped a little piece of the ribbon around the center to hide the wire. Voila! Instant Halloween bow.


I figured out where I wanted to put my bow (because the wreath wasn't perfectly round), and then attached clumps of black glittery roses randomly with hot glue.


I kinda like it just like this!  But it needs an element of scary.


I attached the skulls and spiders using hot glue.  I cut the ring part off of the spiders so they were flat and therefore glued really easily to the wreath.  The skulls, however, were a little tricky, what with being round and all, but if you put enough hot glue on something, it will stay.

And the final creepy Halloween wreath:


What do you think?  I like it but I made the skulls hanging in the center detachable because I think I want to put some sort of sign in the middle when I get around to making one.  I just hot glued three skulls together and glued the bunch to a ribbon, then tied the ribbon to the wreath.

And just so you know, when I blew my nose today, black feathers came out (no joke), and I will probably be finding orange glitter for months.  Oh the perils of crafting.

Wednesday, September 15, 2010

What I Wore Wednesday

Finally... no more shorts!!  Fall has arrived here in Northeast Ohio... yay!

Day: Wednesday
Where: Work
Shirt: Banana Republic
White tank: Walmart
Jeans: AE
Socks (don't you love the houndstooth print?!): Awesome sock store at Mandalay Place in Las Vegas
Shoes: Payless

Day: Thursday
Where: Work
Cardi: Old Navy
Tank: AE
Scarf: Target
Jeans: AE
Shoes: Payless

Day: Friday
Where: Work
Shell & Cardi: Gap
Jeans: AE
Shoes: Kohl's

Day: Saturday
Where: Walmart and haircut
Tank: AE
Jacket: Gap
Jeans: AE
Shoes: Sperry

Day: Sunday
Where: Shopping and to pick up my hubby from the airport
Shirt: Target
Jeans: AE
Shoes: Macy's

Day: Monday
Where: Work
Top: ASU bookstore
Jeans: AE
Shoes: Rainbow

Day: Tuesday
Necklace: Target
Tank & Shirt: AE
Jeans: A&F
Shoes: Rainbow

Linking up to:
the pleated poppy blog